Page Content
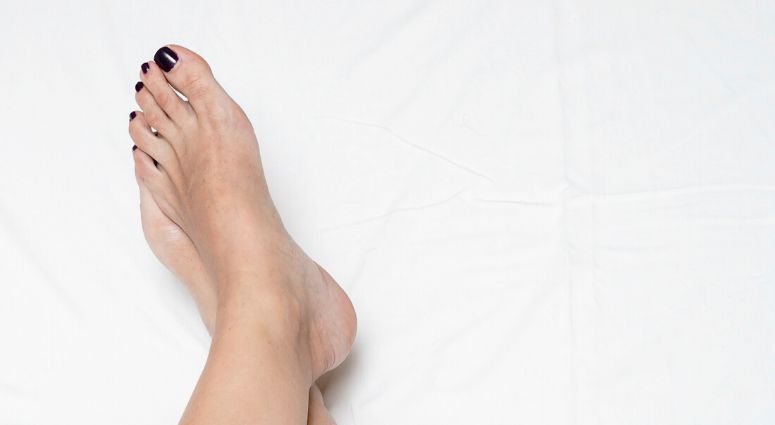
Fake Toenails: Pretty Up Your Feet!
As you shed the last dregs of winter and watch as that warm springtime breeze slowly fades into the soft sunlit hues that can only be the beginning of summertime, there’s no denying the rush of excitement that accompanies peeling back the layers of thick overcoats, knitted sweaters, and long woolen socks, and trading them in for bright cotton dresses that fall just above your knees, pastel handbags to serve as that perfect summer OOTD (outfit of the day) accent piece. Of course, it’s time to brave donning those open-toed sandals that have been gathering dust in your closet for months on end.
While your usual summer plans may have been put on hold for the time being, there’s no reason all those outfits you’ve been fantasizing about since winter have to fall by the wayside. Getting glammed up for a simple trip to the supermarket or a walk around the block is as good a reason as any, and there’s nothing more invigorating than the confidence boost acquired from that feeling of knowing you’re completely groomed from head to toe.
So…while you touch up with that sun-kissed bronzer and add in the peachy tones of summer blushes and red lipsticks to match your perfectly manicured nails, don’t forget to give your toenails some much-needed attention as well. If you are uncomfortable about your feet, or your toes, there are all kinds of fake toenails that can cover up and distract from a host of imperfections. This year, make those open-toed sandals or a barefoot walk on the beach a do-able reality.
The Case For Fake Toenails
When it comes to your toenails, there’s no shame in admitting that they’re often overlooked while you focus on other things. But if you really want to step out in those cute sandals you’ve been saving, then it’s time to take those feet into consideration.
If you’re unsure of where to start, or are worried about the potential hazards of going in for a pedicure, or are just too embarrassed by your feet, have no fear. False toenails, your newest summer staple, are here to save you the time, money, and the hassle of a trip to the salon. If you’re new to the idea of fake toenails and are interested in dipping your toes—literally!—into this world, keep reading for information and tips that will help you choose the right application for you, along with what you need to know about applying, wearing, and removing false toenails, all from the comfort of your own home.
3 Types of DIY Toenails: Pros & Cons
Fake toenails come in a few different versions. There are 3 types of DIY fake toenails that are most popular:
Acrylic Toenails
Acrylic toenails include nail extensions that are placed over the natural nail through different means, all designed to ensure that they stay solid and sturdy. They’re more resistant and much thicker than a natural nail, which may also come in handy for those with sensitive toenails or nails that are prone to infection. What differentiates acrylic nails from the rest is that they’re made with a powder that dries quickly and smoothly, giving your fake toenails all the security and comfort you desire.
- Pros: If you live in constant fear of stubbing your toe and ruining your pedicure, you’re not alone. Luckily, acrylic toenails are the ultimate solution. Aside from protecting your natural nails, they’re also an easy and fun way to achieve that seemingly effortless summer look without breaking the bank. When done right, acrylic toenails will give your toenails the perfect sculpted shape that will stay in place for weeks to come.
- Cons: These may require a bit of a learning curve as there are multiple steps. Also, if you have a large big toe, or very wide toenails, you may have to look to find tips that will accommodate your nail size. Also, there are chemicals involved, so be sure to check on these before you use them.
Dip Powder For Toenails
With dip powder for toenails, there is no tip to be applied…there is a base coat, then the powder dip is applied directly to your own nail a couple of times, and then sealed.
- Pros: If your toenails are a decent length and in basically good condition, this is an easier solution. This is less involved…sort of more like a manicure. These nails last a while…since they’re on your feet it can vary, but definitely much longer than a regular manicure. Less messy and smelly than acrylics.
- Cons: The only real con is removal. So, these are easy to do and look really good, but it can be a process to remove them (more info below). Just be prepared and be patient.
Press-on or Glue On Toenails
Press-on nails are applied with glue and…pressed on! Super simple. These come in different colors and styles, from designs to a gorgeous red. With the right preparation, these can actually stay on for 2-3 weeks.
- Pros: These are so easy to do. Affordable, customizable, you can file or trim them however you want. They are easy to remove (particularly if you use glue on nail remover) and not harmful to your natural nails. They are pretty quick to do, temporary and fun.
- Cons: Because they are glued on, they can occasionally pop off if you haven’t 100% prepared your nails. If you happen to pull one off accidentally, it can damage the surface of your natural nail. These would be best suited to a vacation weekend at the beach, or a special occasion when you need to wear sandals or open toed shoes, etc. (Maybe take along a couple of spare ones in your purse if it makes you feel better!)
How Long Do Fake Toenails Last?
The summer may not last forever, but this comprehensive guide on fake toenails is built to weather every season. Armed with the proper tools and equipment, it should be a breeze applying your acrylic toenails and taking them out on the town (or around your apartment). Either way, we can’t wait for you to venture out with those open-toed sandals with your pretty, painted toenails in full view. So, how long do fake toenails last? If taken care of correctly, acrylic nails can last as long as six to eight weeks. However, it is also necessary to regularly retouch the acrylic material every two to three weeks, or as fast as your nails grow. The good news is that toenails grow at a much slower rate as compared to fingernails, and therefore require less upkeep.
Will Fake Toenails Cover Fungus?
Is it possible to use fake toenails to cover fungus? When it comes to health concerns such as toenail fungus, it’s always better to treat the problem directly. While it might be tempting to simply rely on acrylic toenails to cover up discoloration and other side effects, chances are that you will also run the risk of doing more harm than good. As such, it is advisable to check in with your physician before using fake toenails on fungal infections. But if you really want to move ahead with using fake toenails to cover up fungus, consider having a professional nail technician apply them for you. In addition, while acrylic toenails are built to last over a sustained period, changing your fake toenails more frequently, such as every two weeks, will help mitigate the spread of the infection.
1. ACRYLIC TOENAILS: How to Apply Acrylic Toenails at Home
While acrylic toenails are best applied by the professionals, but if you’re game, there’s no reason you can’t do it yourself! For the first timers out there, it might be beneficial to pop into your local beauty parlor and have a seasoned beauty technician walk you through the basics, so you can take mental notes for when you try your hand at them. But if going to the salon is out of the question, here’s a step-by-step guide on how to apply acrylic toenails at home.
Step 1: Get Your Nails Ready
Much like putting on makeup, you want to start off with the right base. Make sure to clean and buff your nails, as the rough surface of the nail bed will help the acrylic material stick to it better. Don’t forget to completely remove all traces of any existing nail polish you have on, and push back your cuticles.
Step 2: Trim Your Nails
There’s nothing more difficult than attempting to apply acrylic material on overly long toenails! Trim and file your nails, while also leaving a little bit of an allowance so the tip extensions will stay in place.
Step 3: Apply Nail Primer
You wouldn’t slap on foundation and concealer without priming your face first, and the same goes for your toenails. A good nail primer is a valuable product that enhances and affects the longevity of the acrylic material—a must-have for those attempting to do this at home.
When applying the nail primer, simply brush a thin coat over your toenails and wait 40-60 seconds for this to dry. This will leave a tacky sort of residue on the nail, the perfect base for the acrylic to go on.
Step 4: Application of the Tips
Find the right tip size for your toenail for that realistic and natural touch. The acrylic tip should not be too large or too small, and can also be filed and trimmed down to size. Once you have the tips ready, apply the bottom edge of the tip to the middle part of your toenail with nail glue. Do not cover your entire nail with it, as your nail bed will be needed for the acrylic application.
Step 5: Prepare the Acrylic Material
The magic of acrylic toenails all boils down to the mixture of two important tools: acrylic powder and liquid acrylic. This will form the base of your fake toenails and provide that smooth and sturdy finish. Both can be sourced from your local drugstore or ordered online, but make sure to read up on the ingredients and reviews listed with each product so that you get the best value for your money. Here are some common brands to choose from:
To prepare the materials, pour the acrylic liquid into an acrylic dish and dispense some of the acrylic powder into a separate container. You’ll be making use of both when you apply them to your toenails, so have them right next to each other on a clean, flat surface.
Step 6: Apply the Acrylic
Dip a sculpting nail brush into the liquid acrylic, taking care to wipe the excess residue along the edge of the container so that the brush is merely coated just so. Next, touch the tip of the damp brush into the powder so that you form a small amount on the tip.
At this, a tiny ball of the acrylic mixture should collect on the end of the brush. This mixture should be moist enough to spread evenly, but not too wet. Gently brush the mixture along your toenail in careful strokes, starting from the bottom edge of the acrylic tip, all the way to the top. Add a second ball of mixture starting from the cuticle to the section where the tip meets your natural nail. Keep brushing the mixture over your nail until you achieve a smooth, polished coat.
This technique can take a little practice, but will result in long-lasting, durable nails. There are a number of DIY acrylic nail kits to choose from.
Step 7: Finishing Touches
Once the acrylic material has dried, which will take about ten minutes, file your toenails to clean them. After that, you’re ready to paint them in all the vibrant summer shades and patterns all you want. Wear those strappy sandals with pride and show off your hard work!
A couple of resources:
How to Remove Acrylic Toenails
Removing your fake toenails means taking all the necessary precautions. As much as you’ll no doubt enjoy debuting your brand new acrylic nails to the world, there will come a time when you’ll need to remove and replace them in order to protect the health of your toenails. Be sure to read and follow the directions given on your product. A simple yet effective method of acrylic toenail removal is by soaking your toes in a combination of warm water and acetone for 30-45 minutes. Acetone is a strong chemical that will dissolve the acrylic enough for you to gently pull them out with tweezers. While acetone is safe to use, it’s also best to keep it away from your skin as much as possible.
2. POWDER DIP TOENAILS Application
Step 1: Prepare your Toenails
Start with clean, trimmed nails. Remove any polish and gently push back the cuticles and remove extra skin. Carefully buff the surface of your nail and brush away any powder residue with a manicure or makeup brush
Step 2: Trim Nails & Edges
File around your nail to remove any edges, tips or roughness.
Step 3: Wipe & Sanitize
Wipe your nails with a little alcohol on a cotton ball. This removes any remaining dust, oils or bacteria prior to the application.
Step 4: Prime & Dip
You will then apply a primer followed by a base coat. After you apply the base coat, you will dip the nail into the powder and gently tap to remove excess. You will repeat this process on each nail, and then begin again once more, using the base coat and then dipping into the powder.
3. HOW TO APPLY PRESS-ON OR GLUE-ON TOENAILS
If you want to maintain artificial toenails that are pretty, easy to put on and take off, and that offer all kinds of colors, add-ons and styles, this is our #1 pick! With the less amount of effort required to put them on and take them off, you can change them as often as you like. With the right prep, these can stay on for up to 2-3 weeks. Opting for a high quality nail
- Press on nails are exactly that…they usually come with just an alcohol swab, a nail file and an orange cuticle stick. These are pre-glued, so all you have to do is press them on the nail. They are flexible so that they will give a good fit.
- The glue-on toenails come with the nail glue. You brush a light coat on the nail, press the nail on and hold for a few seconds. That’s it!
Press on nails are very easy to remove simply by soaking the nails in very hot soapy water for about 15 minutes and then gently lift Around the edges with an orange cuticle stick. Some of the nails pay pop right off, some may require that you repeat the steps, Finish the process by buffing and trimming your nails, and apply some cuticle oil. Here are some different brands and styles to check out: Kiss Everlasting French Toenails You might also like: